Already installed and ready to optimize your first image? This is the shortest path — five steps, about five minutes, no settings tweaking required. Defaults are sensible for almost every site, so you can always come back to the Settings page to refine later. If you haven’t installed the plugin yet, see Installation first.
Five steps to your first optimized image
Install & activate the plugin
Search for “Image SEO Optimizer” in Plugins → Add New, click Install Now, then Activate. The setup wizard launches automatically — walk through its four steps, or click Skip Setup and pick up here.
Add a Google API key (cheapest provider)
Open aistudio.google.com/app/apikey, click Create API key, copy it. On the API Keys page (or the wizard’s API keys step), paste it into the Google field and click Test Key — it reports valid, invalid with the provider’s own message, or unverified when the provider could not be reached, and the key is saved in all three cases. Anthropic and OpenAI also work; Google carries the Recommended badge in the wizard and is the cheapest of the three at the plugin’s reference pricing. On WordPress 7.0 or later the wizard asks first how you want to connect, and choosing WordPress AI (Connectors) skips the key step entirely.
Pick an image in the Images table
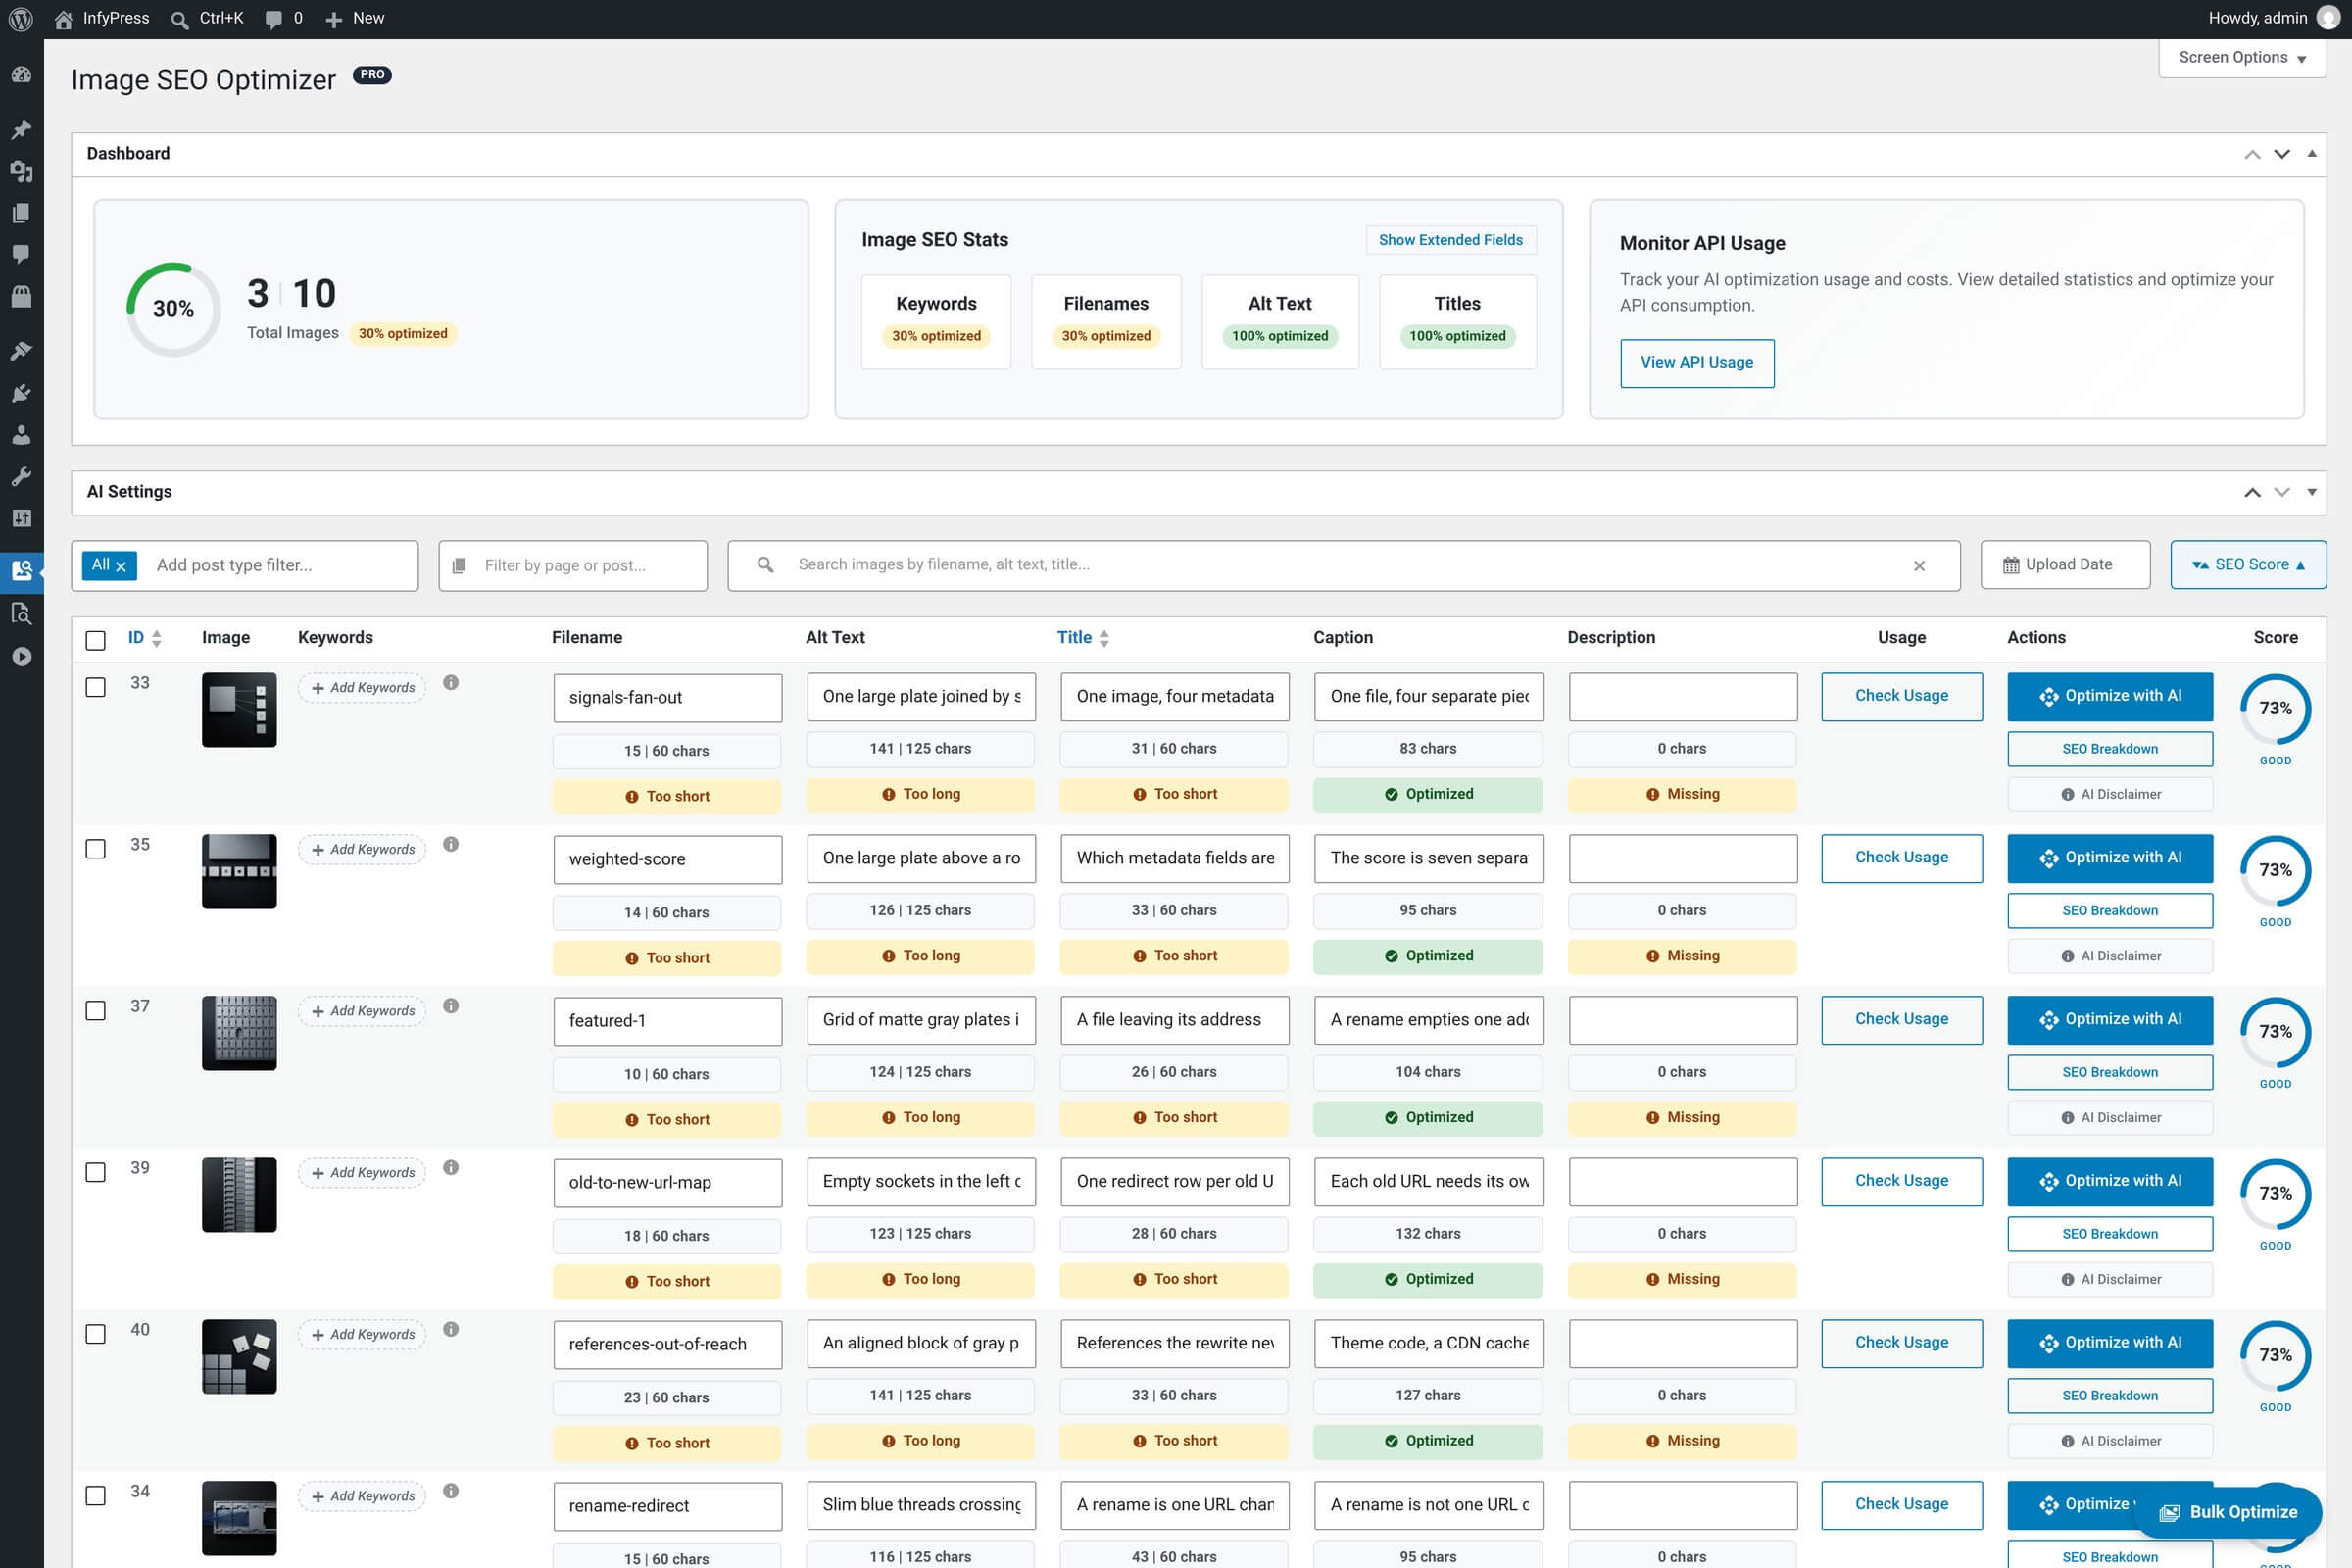
From the dashboard, the Image SEO Stats table lists every image in your media library. Pick any image — ideally one with a generic filename (IMG_2034.jpg) so the AI improvements are obvious.
Click Optimize with AI
Hit the Optimize with AI button on the row. The AI analyzes the image and writes alt text, a clean SEO filename, a title and keywords in one pass. A single image takes a few seconds; the request timeout is 60 seconds by default, so a slow provider fails rather than hangs.
Review the SEO score, edit if needed
When the run finishes, the row’s SEO score updates (out of 100) and each AI-generated field becomes editable inline. Tweak anything that doesn’t fit your voice and save. The score recalculates as you edit. Filename changes auto-301-redirect, and references in all six supported page builders are rewritten automatically — no manual cleanup.
Tips for first-time users
Optimize one image first, then bulk
Always run a single image first to confirm the AI’s tone matches your site. Once you’re happy with the output, the bulk action in the Images table works through your selection in the browser. Every image counts against the free plugin’s limit of 100 AI calls per hour per user, so a large library needs several sittings. Pro adds pause and resume plus custom prompts.
Don’t worry about cost
The plugin estimates cost from the model’s blended token price and a flat assumption of roughly 1,000 tokens per image. Gemini 3.1 Flash-Lite is priced at $0.56 per million tokens in the model registry, which works out to about $0.56 per 1,000 images. That is an estimate, not your invoice — the API Usage page (Image SEO → API Usage) logs every call, and provider prices change. On a site with a Pro license, triple it: a full optimization also writes the caption and the description, one AI call each. Registry prices checked 2026-08-12.
Filename renames are real
When the AI suggests a new filename, accepting it physically renames the file on disk and rewrites every page-builder reference. The old URL is 301-redirected, so search engines and bookmarks keep working — but if you have hand-written theme code or third-party caches that hard-code image URLs, those won’t auto-update. The Image Usage modal shows every place an image is referenced before you rename — see Image Usage Tracker.